Wednesday, April 27, 2011

Good to know: Flour

Most recipes call for a specific type of flour, whether its cake flour, all-purpose flour, or pastry flour; here's what the difference is and why one is preferred over another for certain recipes.

The main difference among flour types is in the gluten content, which varies depending on whether the flour is made from hard wheat or soft wheat. Gluten is the protein that helps yeast stretch and rise. To achieve the best baking results, use the type of flour a recipe specifically calls for.

All-purpose flour is designed for a number of uses, including cookies, quick breads, biscuits, and cakes. A mixture of high-gluten hard wheat and low-gluten soft wheat, it comes in both bleached and unbleached forms, which can be used interchangeably.

Bread flour is an unbleached, high-gluten blend of mostly hard wheat and is best used in yeast breads.

Cake flour is made predominantly of soft wheat. Its fine texture and high starch content make it ideal for making tender cakes, cookies, biscuits, and pastries that do not need to stretch and rise much.

Pastry flour is similar to cake flour but has a slightly higher gluten content. This aids the elasticity needed to hold together the buttery layers in flaky doughs such as croissants, puff pastry, and pie crusts.

Self-rising flour is all-purpose flour that has had baking powder and salt added to it. Use it in yeast bread recipes in place of all-purpose flour by omitting salt, and in quick bread recipes by omitting salt and baking powder.

(Found on TLC Cooking "Baking Flour facts")

Recipe: Frushi with Strawberry Reduction Sauce

This is a delicious recipe that's easy, light and screams SPRING!


What you need:

For Frushi:
~ 1 cup short grain or other sushi rice, rinsed
~ 1 cup water
~ 1 cup unsweetened coconut milk (lite is fine)
~ 1 to 2 tbs granulated sugar
~ pinch of salt
~ 4 ripe peaches or nectarines
~ 1/4 cup fruit preserves
~ 1 pint fresh strawberries, thinly sliced
~ 36 berries (fresh raspberries, blueberries, or blackberries)

For Reduction:
~ 2 cups diced strawberries
~1/2 tsp black pepper
~ 2 tsp orange juice
~ 1/2 cup water
~ 2 tbs balsamic vinegar

Directions:

To make sushi:
~ Add rice, water, and coconut milk to a pot, and bring to a boil. Lower heat, cover, and simmer until the liquid is absorbed and the rice is soft, (add a small amount of extra water or coconut milk if the rice is not done but liquid has evaporated).

~ Next, stir sugar and salt in with cooked rice. Gently fluff rice with a fork to distribute evenly. Let rice cool completely. Best to refrigerate to get best stickiness.

~ Blanch peaches in boiling water for 60 seconds. Place in a bowl of ice water to cool, then peel off skin. Thinly slice half-moons from the fruit pit.

~Create oblong mounds from the cooled rice-these become the pieces of sushi-by pressing bits of rice between the palms of your hands. Then carefully spread a thin layer of preserves on top of each mound, top with peach slice, strawberry slice, and a berry.

To prepare the sauce:
~ Add diced strawberries, pepper, orange juice, water, and vinegar to a pot and heat over medium heat until reduced to a syrupy consistency. Strain through a fine-mesh strainer until completely smooth, reserve for later use.

We used the reduction sauce as our "soy" sauce to dip our sushi in. My daughter absolutely LOVES this recipe... and its fun to say FRUSHI!

(Found in The Vegan Table, by Colleen Patrick-Goudreau)

Tuesday, April 19, 2011

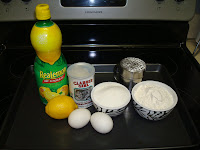
Recipe: Lemon Bars

This recipe is a classic! As well as a favorite mention in many books and movies about stopping by Granny so-and-so's for Lemon Bars... but they're right. Don't need to be a granny to make this slightly-tart, sunny treat!

What you need:

Crust:
~ 1/2 cup butter, softened
~ 1/4 cup sugar
~ 1 cup all-purpose flour

Filling:
~ 3/4 cup of sugar
~ 2 eggs
~ 3 Tbs. Lemon Juice
~ 2 Tbs. all-purpose flour
~ 1/4 tsp. baking powder
~ 1 Tbs. lemon zest

~ 8 inch square pan
~ confectioners sugar

What you do:

~ In stand mixer, cream butter and sugar until light and fluffy; gradually beat in flour until blended.

~ Press into an ungreased pan. Bake at 350 for 15-20 minutes or until edges are lightly brown.

~ For filling, in electric mixer, beat sugar, eggs, lemon juice, flour, baking powder, and lemon zest until frothy. Pour over crust.
~ Bake for 10-15 minutes until set and lightly brown. Cool and place in refrigerator. Cut into squares, shake confectioners sugar, and enjoy!

Friday, April 15, 2011

Recipe: Oreo Truffles


Oreo truffles are a new find we have in our house and LOVE. Very few can resist the allure of the dark chocolate cookie and the double stuff! So... how on earth could you make it better... a truffle of course. They're easy and delicious!

What you need:

~ One package Oreo's (original or double stuffed)
~ One 8 oz. package cream cheese, softened
~ Powdered (or confectioners) sugar, 1/2 cup
~ Cookie Sheet
~ wax paper
~ large (gallon size) Ziploc bag
~ meat tenderizer, wooden spoon, or rolling pin
~ electric mixer is a huge help, but regular mixers should work as well

What you do:

~ Take your package of Oreo's and empty into your large gallon-size ziploc bag. Crush. You can do in food processor as well, but lets face it, it isn't as much fun! Crush completely until Oreo's are fine, and no large chunks are visible.

~ In electric mixer, with paddle attachment, combine crushed Oreo's and cream cheese. Slowly add powdered sugar one tablespoon at a time until consistency is reached where the Oreo mixture will stay in a solid ball and not flatten out, if using double stuffed Oreo's you'll need more sugar.

~ Roll mixture into tablespoon sized balls and place onto wax paper on your cookie sheet. Continue until mixture gone. Refrigerate until your ready to eat, they could melt!

ENJOY!

Thursday, April 7, 2011

How to: Make your own Chocolate Covered Strawberries

Chocolate covered strawberries are a great treat any time of year. Even if the strawberries aren't the most ripe, adding chocolate to them can help curve the tartness. At grocery stores, or specialty candy stores, a dozen strawberry's can cost you $14 or more! Making them at home is easy, fun, and much less expensive.
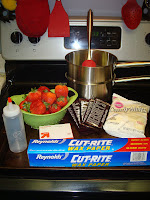
What you need:

~1 lb. strawberries (the bigger the better), cleaned and DRY, stems on
~Double-Boiler or candy melting appliance (You can also use your microwave, but its not recommended due to candy being easily burnt)
~14 oz. of Wilton Candy melts OR Solid chocolate bar, dark or milk OR Milk or semi-sweet chocolate chips (although I don't recommend as they sometimes don't melt as smoothly).
~ Wax paper
~ Cookie sheet (jelly roll pan)
~ toothpicks
~ Plastic bottle (optional)

What to do:

~ Start melting your candy or chocolate of choice over double broiler.

~ Place wax paper over cookie sheet.

~ Make sure chocolate is fully melted, no chunks should be visible.

~ Making sure strawberries are DRY, poke TOP of strawberry and dip into fully melted chocolate, avoiding touching bottom of pan. Twirl strawberry until fully coated, leaving top near stem free of chocolate.

~ Place on waxed paper and continue until all strawberries have been coated. Make sure to stir chocolate every third or so strawberries to keep smooth and melted.

~ If double dipping, allow first layer to cool, then dip strawberry again in desired second layer.

~If adding stripes, or swirls, take the plastic bottle and fill with candy of choice. Melt in microwave for 15 seconds at a time, making sure to smooth out any chunks in between cooking times. BE CAREFUL GETS HOT VERY FAST! WILL ALSO BURN QUICKLY. Take bottle and quickly squeeze over desired areas.

~Fully cool in refrigerator before moving into airtight container.

~Will keep for several days refrigerated in an airtight container... if you let them.

How to: Make your own colored sugars


Colored sugars are a fun way to add color and texture to any project; however, with large quantities needed, or specific colors, it can be daunting to hunt for exactly what you need. Instead of running to your local craft store, grocery store, or neighbors house, why not make some? Its fun, easy, and much less expensive than buying it at the store.

Here's what you'll need:


~Granulated sugar (from course to extra fine its your call)
~Regular food coloring
~Large Ziploc Bag
~Waxed paper
~Cookie sheet (or jelly roll pan)
~Air tight storage container

What you do:

~Take the desired amount of granulated sugar and place in Ziploc bag. Drop a few drops of desired food coloring into bag (the more you add the deeper the color will be). I typically add between 2 and 6 drops of color (making RED or dark colors require much more).

~ Seal Ziploc bag tightly, with as little air as possible. Kneed the food coloring into the sugar, making sure to alternate sides of bag so you coat evenly. When color is fully coated there will be no chunks of colored sugar left.

~Place a sheet of waxed paper on top of the cookie sheet. Pour contents of Ziploc bag out onto wax paper, spread evenly, and allow to dry in cool, dry place. Usually a few hours. I make in the evening and dry overnight.

~When sugar is dry, break up to loosen sugar crystals, and place in airtight container.

Now you have made your very own colored sugars for your next project.

Good to know: Gluten-free


Gluten-free diets and food labels are becoming more and more predominant; but what is GLUTEN and why gluten free?

Gluten is a protein found in wheat (including kamut and spelt), barley, rye, malts, and triticale. It is used as a food additive in the form of a flavoring, stabilizing or thickening agent, often hidden under "dextrin".

A gluten-free diet is the only acceptable treatment for celiac disease and wheat allergy.

Most foods that are marked "gluten free" contain no or a very small amount of gluten. Other items that are good alternatives, and most common replacement for wheat, in gluten-free diets are potatoes, corn, tapioca, and rice. Baking for gluten-free diets can be a challenge, but not impossible. Usually the flavor remains the same, but the texture of baked items changes, however with the right mix of ingredients the difference is barely noticeable.


Good to know: Cream of Tartar

Cream of Tartar is a mystery ingredient that is asked for often... but not many seem to know what it does.

Cream of tarter actually isn't a cream at all... its a dry white powder. Originally a bi-product of wine making, cream of tartar is an acid that is mixed with baking soda to create baking powder. It acts as an acid, while the baking soda emits carbon dioxide to make the dough or batter rise, or leaven, properly, helping to create fluffy baked items.

Some recipes may ask for baking powder, baking soda and cream of tartar separately, or not at all. It depends on the other ingredients involved in the recipe and the amount of acid contained in the ingredients and the balancing act to make it rise.

Good to know: Baking Powder and Baking Soda

Countless recipes call for baking powder and baking soda, and although they're very commonly used, most don't know why.

Baking soda is used to produce carbon dioxide in batters that help it to "rise" or leaven baked items. There are many acidic ingredients in lots of cakes, breads, and the like, such as: some fruits (like bananas), brown sugar, molasses, buttermilk, and others. So the baking soda is used to combat the acid and allow the dough or batter to rise properly so you get those fluffy cakes and muffins you desired.

Baking powder contains baking soda and other dry acidic ingredients that are used similarly; however, baking powder has more kick to it since it doesn't rely on the ingredients of the batter alone, which helps the batter rise better or leaven higher than just the baking soda alone. Generally one teaspoon of baking powder leavens one cup of flour.

There are commonly two types of baking powder: single-acting and double-acting powders. Single-acting powders are activated by moisture, so you must bake recipes which include this product immediately after mixing. Double-acting powders react in two phases and can stand for a while before baking. With double-acting powder, some gas is released at room temperature when the powder is added to dough, but the majority of the gas is released after the temperature of the dough increases in the oven.